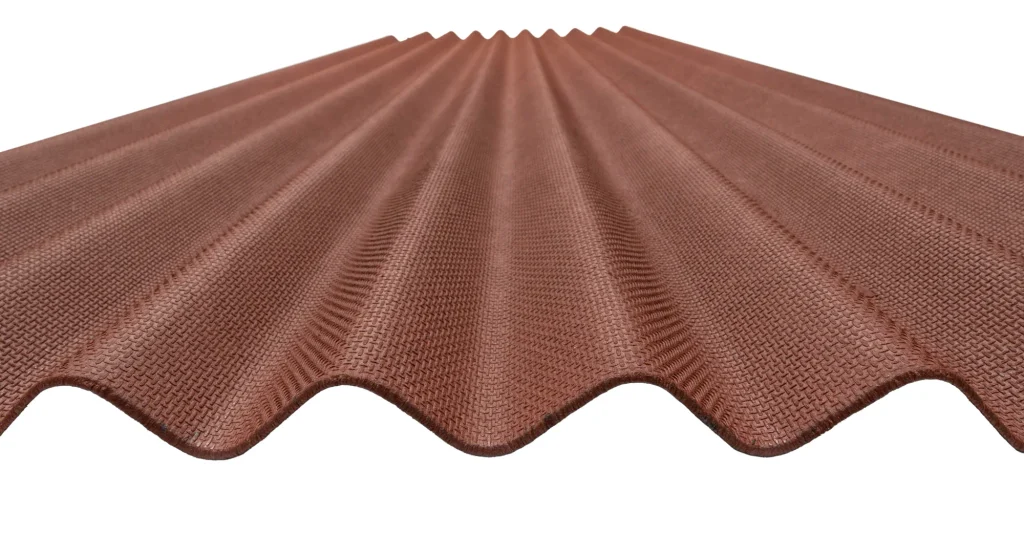
Fitting bitumen roofing sheets correctly is essential for creating a durable, weather-resistant roof that protects your building from the elements. Whether you're covering a garden shed, garage, stable or outdoor storage area, understanding the correct installation process can help you achieve a secure and professional finish. With the right preparation, suitable fixings and careful attention to detail, corrugated bitumen roofing sheets provide a practical roofing solution for a wide range of domestic and agricultural projects.
Bitumen roofing sheets are a popular choice for DIY enthusiasts and professional installers thanks to their lightweight construction, versatility and straightforward installation. Their corrugated profile helps channel rainwater away from the roof, while the bitumen-based material gives you a weather-resistant covering without the weight associated with some traditional roofing materials. They are also relatively easy to handle and cut, making bitumen sheets particularly useful for smaller roofing projects where installation efficiency is important.
However, achieving a reliable installation involves more than simply positioning the sheets and securing them to the roof structure...
Factors such as roof pitch, supporting framework, sheet overlaps and fixing placement all influence how effectively the finished roof performs. Incorrect installation can lead to water ingress, unsupported sections, loose fixings or premature deterioration, potentially resulting in avoidable repairs and additional costs.
In this Sheeting Giant guide, we'll explain how to fit bitumen roofing sheets correctly, covering everything from preparing the roof and calculating material requirements to positioning, overlapping and securing the sheets. We'll also highlight common installation mistakes and explain why choosing compatible roofing accessories is important.
Whether you're replacing an existing shed roof or installing sheets on a new outbuilding, these practical steps will help you approach your project with confidence.
Before fitting bitumen roofing sheets, it's important to check that the supporting roof structure is suitable for the material and installation method you intend to use. Corrugated bitumen sheets generally require appropriately spaced timber supports or purlins, with the exact spacing determined by the manufacturer's specifications, roof pitch and expected loading conditions. The framework should be structurally sound, correctly aligned and free from damaged timber that could compromise the installation. Taking time to prepare the roof properly will make positioning and fixing the sheets easier while helping to prevent movement, sagging and other problems after installation.
Accurate measurements are essential when ordering bitumen roofing sheets, particularly because the total sheet dimensions are different from the area each sheet will cover once overlaps are taken into account. Corrugated sheets are installed with overlapping edges to help prevent rainwater entering between adjoining sections, which reduces their effective coverage. The amount of overlap required depends on the sheet profile, manufacturer recommendations and roof pitch, so it's important to establish these requirements before calculating quantities. Measuring carefully at this stage can help you avoid ordering too few sheets, purchasing unnecessary materials or making adjustments during installation.
Once the roof has been prepared and the required materials are available, the next stage involves cutting and positioning the bitumen roofing sheets. Their relatively lightweight construction makes them easier to handle than many heavier roofing materials, although care is still needed to avoid damaging the corrugated profile. Sheets should be positioned in accordance with the manufacturer's recommended laying direction, with particular attention paid to the prevailing wind, roof edges and drainage arrangements. Careful alignment from the first sheet onwards is especially important, as small positioning errors can become more noticeable across the roof.
Correctly overlapping bitumen roofing sheets is one of the most important parts of achieving a weather-resistant roof covering. The overlaps help direct rainwater over the surface of the sheets rather than allowing it to enter through joints between adjoining sections. There are two main types to consider: side overlaps, where neighbouring sheets meet along their corrugated edges, and end overlaps, where one sheet sits above another along the roof slope. The required overlap dimensions vary between products and installation conditions, making it essential to follow the relevant manufacturer's instructions rather than applying the same measurements to every roof.
Using the correct fixings and installation pattern is essential for keeping bitumen roofing sheets securely attached to the supporting structure. Roofing sheets are exposed to changing weather conditions, including wind uplift, rainfall and temperature variations, so fixings must be suitable for both the sheet profile and the supporting material. Many corrugated bitumen roofing systems require fixings to be positioned through the crowns of the corrugations, although the exact method, quantity and spacing depend on the manufacturer's instructions. Incorrect fixing placement or excessive tightening can damage the sheets, reduce their weather resistance or affect how they perform over time.
Once the main bitumen roofing sheets have been secured, the remaining roof details need to be completed to provide a suitable finish and help protect vulnerable areas from water ingress. Roof ridges, verges and junctions can be particularly exposed to wind-driven rain, making compatible accessories an important part of the installation. Ridge pieces are designed to cover the meeting point between two roof slopes, while other finishing components may be needed around roof edges or adjoining structures.
Choosing accessories that match the sheet profile and following the correct fixing arrangements will help create a more consistent and reliable roof covering.
Even relatively straightforward roof sheeting projects can develop problems when important installation requirements are overlooked. Common mistakes include using insufficient sheet overlaps, fitting the material to an unsuitable roof pitch, installing incorrect fixings or failing to provide adequate support beneath the sheets. These issues may not always be immediately noticeable, but they can affect the roof's ability to withstand prolonged rainfall, strong winds and everyday exposure. Understanding the most common installation errors can help you identify potential problems before they result in damage or costly remedial work.
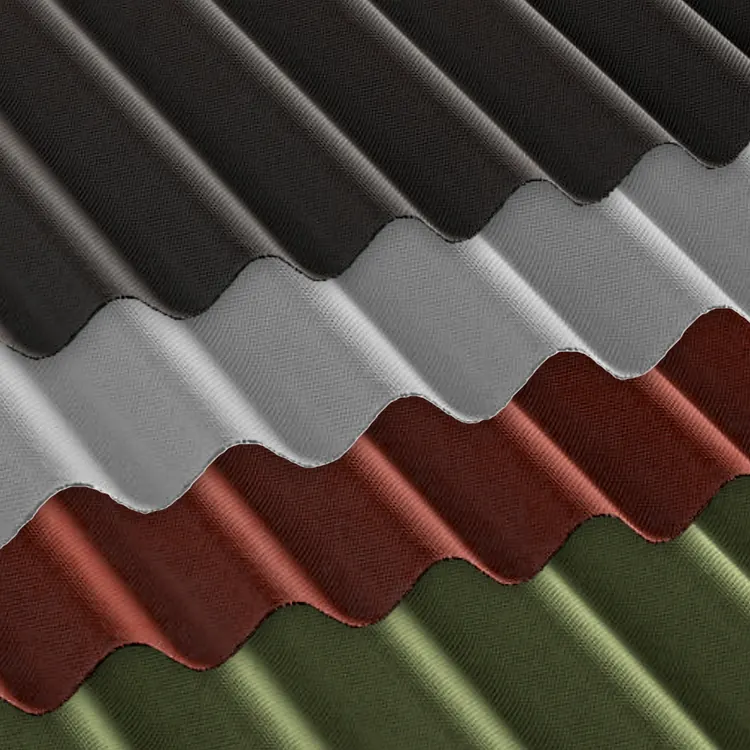
Correct installation begins with selecting roofing sheets that are suitable for your building, roof structure and intended application. Corrugated bitumen roofing sheets are a practical covering for many sheds, garden buildings, stables and outbuildings, but suitability depends on factors including roof pitch, structural support, weather exposure and the manufacturer's product specifications. Before ordering, it's worth checking the sheet dimensions, effective coverage and compatible accessories so you can plan the installation accurately.
At Sheeting Giant, you'll find a selection of roofing sheet materials and accessories to help you prepare for your next project. Explore our range of bitumen roofing sheets and compatible roofing accessories to find suitable products for your installation.
With careful preparation, accurate measurements and the correct fitting techniques, you can achieve a secure, weather-resistant bitumen roof that provides dependable protection for your building.
How do you install bitumen roofing sheets?
To install bitumen roofing sheets, begin by checking that your roof structure is suitable and that the supporting battens or purlins are correctly spaced. Position the sheets from the recommended starting point, allowing for the required side and end overlaps to prevent water ingress. Secure each sheet using compatible roofing fixings, following the manufacturer's fixing pattern and spacing requirements. Finish the installation with suitable ridge pieces and edge details where required.
How much should bitumen roofing sheets overlap?
The amount of overlap required for bitumen roofing sheets depends on the roof pitch, sheet profile and manufacturer's installation instructions. Corrugated bitumen sheets typically require a side overlap of at least one corrugation, although some products and roof conditions require more. End overlaps also vary according to the roof slope and product specifications. Always check the recommended overlap measurements before fitting to help prevent rainwater entering between sheets.
What is the minimum roof pitch for bitumen roofing sheets?
The minimum roof pitch for bitumen roofing sheets varies depending on the product and manufacturer. Some corrugated bitumen roofing systems are suitable for relatively shallow roof slopes when installed with the specified overlaps and supporting structure, while others require a steeper pitch. Installing sheets below their recommended minimum pitch can increase the risk of standing water and leaks. Check the product's technical specifications before purchasing or installing the sheets.
What fixings should you use for bitumen roofing sheets?
Bitumen roofing sheets should be installed using fixings recommended for the specific sheet profile and supporting structure. Depending on the roofing system, these may include specialist roofing nails or screws with suitable sealing washers or caps. Many corrugated bitumen sheets are fixed through the raised corrugations to help protect fixing points against water ingress. Follow the manufacturer's guidance for fixing positions, quantities and installation methods.
Can you cut bitumen roofing sheets to size?
Yes, many corrugated bitumen roofing sheets can be cut to size using suitable hand tools or power tools recommended by the manufacturer. Measure and mark the cutting line carefully before cutting, and support the sheet to prevent unnecessary movement or damage. Always wear appropriate protective equipment and follow the relevant cutting instructions. Accurate cutting helps achieve a neater finish around roof edges and other installation details.
Can you install bitumen roofing sheets directly onto plywood?
Whether bitumen roofing sheets can be installed directly onto plywood depends on the manufacturer's approved installation method. Many corrugated bitumen roofing systems are designed to be secured to appropriately spaced battens or purlins rather than fixed directly onto a continuous plywood surface. Installing sheets without the recommended support arrangement may affect ventilation, fixing performance and the roof's overall suitability. Always check the product's installation instructions before fitting sheets over plywood or other solid decking.
Can you put bitumen roofing sheets over an existing shed roof?
In some circumstances, bitumen roofing sheets can be installed as part of a roof refurbishment, but fitting them directly over an existing covering is not always suitable. The condition of the existing roof, structural capacity, ventilation and fixing requirements must all be considered. Damaged or deteriorating materials may need to be removed before installation. Check the manufacturer's guidance and ensure the supporting structure can accommodate the proposed roofing system.
How far apart should supports be for bitumen roofing sheets?
The required spacing between battens or purlins depends on the bitumen roofing sheet profile, roof pitch and manufacturer's specifications. Support spacing may also be affected by expected loads and exposure to wind or snow. Supports positioned too far apart can allow sheets to sag or become damaged over time. Always use the recommended support arrangement for your chosen roofing sheets rather than relying on a standard measurement.
Do you need to seal bitumen roofing sheet overlaps?
Not all bitumen roofing systems require additional sealant between overlapping sheets. When sheets are installed with the correct overlaps, roof pitch and fixings, the roofing system is generally designed to direct rainwater away through its overlapping profile. However, some products or installation conditions may require compatible sealing materials or additional weatherproofing details. Follow the manufacturer's recommendations and avoid using sealants that have not been approved for the roofing system.
Can you walk on bitumen roofing sheets during installation?
You should not walk directly on unsupported bitumen roofing sheets, as they may bend, crack or become damaged under concentrated loads. Roofing work also presents a serious risk of falls, particularly when working on fragile or sloping surfaces. Use suitable access equipment, appropriate fall protection and any manufacturer-approved load-spreading arrangements. Never assume that installed roofing sheets are safe to stand on.
What are the most common mistakes when installing bitumen roofing sheets?
Common installation mistakes include using insufficient overlaps, choosing incompatible fixings, installing sheets on an unsuitable roof pitch and failing to provide adequate structural support. Incorrect fixing placement or overtightening can also damage the corrugated profile and compromise weather resistance. Poorly finished ridges and roof edges may allow water to enter during heavy rainfall. Following the manufacturer's installation instructions and checking each stage of the installation can help prevent these problems from occurring.